What to Do When Your Site Is Marked “Deceptive Site Ahead”
There's no official hard cap, but here's a realistic range based on how the process actually plays out:
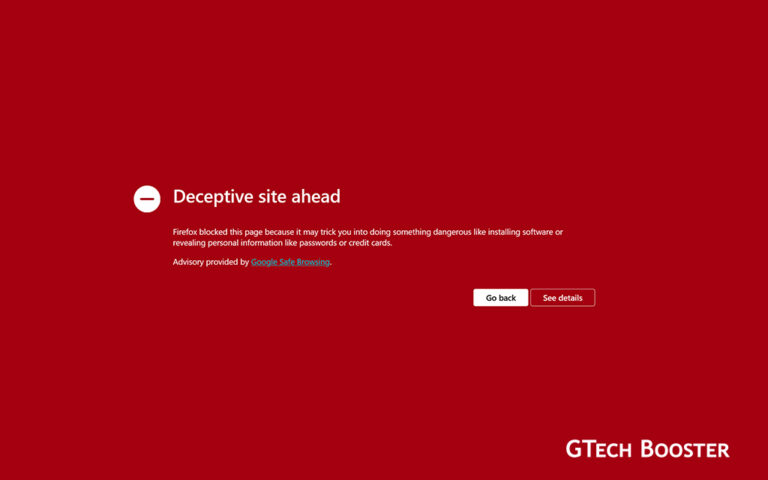
If you have tried to visit your own website and been stopped by a red warning screen in Firefox that reads something like “Deceptive site ahead” with a note that the page “may trick you into doing something dangerous like installing software or revealing personal information like passwords or credit cards,” your site has been flagged by Google Safe Browsing. This is not a Firefox-specific penalty. Firefox, Chrome, and several other browsers all pull from the same Google Safe Browsing database, so the same warning is likely showing up everywhere your visitors try to reach you.
This guide walks through what the warning means, why it happens, and the exact steps to get it removed.
What This Warning Actually Means
Google Safe Browsing is a service that continuously scans billions of URLs looking for sites that host phishing pages, malware, or “social engineering” content designed to trick visitors into handing over credentials, payment details, or installing unwanted software. When their systems find a match on your domain, they add it to a shared blocklist that web browsers check before loading a page.
The “Deceptive site ahead” label specifically points to social engineering content. That is a different category from “This site contains malware,” and it usually means Google’s crawler found something on your site that looks like:
- A fake login page impersonating a real service (a bank, a webmail provider, a software vendor)
- A page pretending to be a security alert or software update prompt
- A fake download button or fake “your computer is infected” popup
- Content designed to harvest personal or financial information under false pretenses
Importantly, this does not always mean you did anything wrong on purpose. In the large majority of cases, the site owner’s website was hacked and the attacker planted the deceptive content without the owner’s knowledge.
Step 1: Confirm the Flag and See the Specifics
Before doing anything else, get details straight from Google rather than guessing.
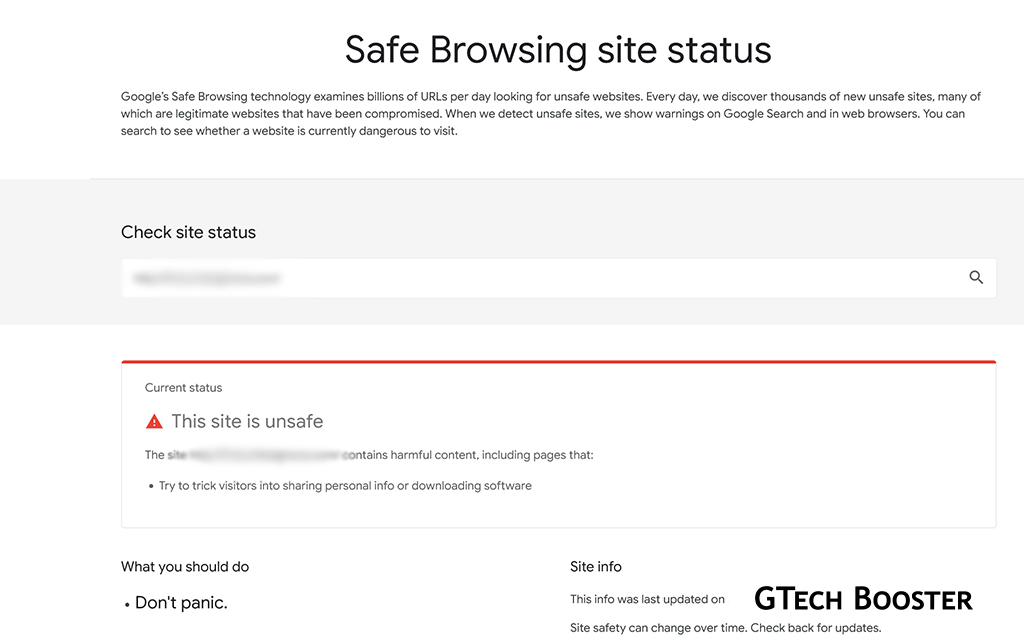
- Go to Google’s Safe Browsing site status page and enter your domain:
https://transparencyreport.google.com/safe-browsing/search - This will tell you whether Google currently lists your site as dangerous, and often gives a rough category (malware, phishing, or deceptive/social engineering content).
- If you have access to Google Search Console for the domain, check the “Security Issues” report under the Security & Manual Actions section. This is the most detailed source you will get, and it often lists example URLs on your site that triggered the flag, which is far more useful than checking the homepage alone.
If you do not already have Search Console set up for the domain, set it up now (you can verify ownership through a DNS record, an HTML file upload, or your domain registrar). You will need it both to see the details and to request a review later.
Step 2: Take the Site Offline or Restrict Access Temporarily
While you investigate, consider putting the site into maintenance mode or restricting public access. This limits further damage to visitors and prevents search engines from re-crawling and re-confirming the bad content while you work. If your host offers a quick “maintenance mode” toggle, use it. If not, a simple holding page with a 503 status code is a reasonable temporary measure.
Do not simply delete the entire site without investigating first. You want to identify the injected files so you understand how the attacker got in, otherwise you risk reinfection right after cleanup.
Step 3: Find and Remove the Malicious Content
This is the core of the fix. The specific approach depends on your platform, but the general process is the same everywhere.
Look for common injection points
- Recently modified files. Check file modification timestamps on your server. Malicious code is often injected into existing PHP, JS, or HTML files rather than added as obvious new pages.
- Unknown admin accounts or users. Check your CMS user list (WordPress, Joomla, etc.) for accounts you do not recognize.
- Suspicious plugins, themes, or extensions. Attackers frequently exploit outdated plugins. Compare your installed plugin list against what you actually use, and check for anything you do not recall installing.
- .htaccess file changes. On Apache servers, attackers often modify .htaccess to redirect only certain visitors (like search engine crawlers) to malicious content, which is why the owner may never see it when browsing normally.
- New or unexpected pages. Search for newly created files in your uploads or media directories, especially ones with executable extensions.
- Database injections. For CMS-driven sites, malicious script tags or hidden iframes are sometimes inserted directly into post content, widgets, or theme options stored in the database.
Use scanning tools
- If you are on WordPress, plugins like Wordfence or Sucuri can scan for known malware signatures and altered core files.
- Sucuri also offers a free external site checker (
sitecheck.sucuri.net) that can point out the specific malicious code it finds on a public-facing page. - Your hosting provider may also offer built-in malware scanning as part of their support tools. Many hosts have a security team that can assist directly, especially if you are on managed WordPress or shared hosting.
Restore from a clean backup if possible
If you have a backup from before the compromise, and you can confirm the backup date predates the infection, restoring from it is often faster and more reliable than manually hunting through every file. After restoring, immediately update everything (see Step 4) before the site goes back online, since the same vulnerability that was exploited before is still there in an old backup.
Step 4: Close the Security Hole
Removing the malicious content without fixing how the attacker got in will likely result in reinfection within days. Common entry points include:
- Outdated CMS core software, plugins, or themes
- Weak or reused admin passwords
- Outdated server software or exposed admin panels
- Vulnerable third-party scripts or ad networks
- Compromised FTP or hosting account credentials
Steps to take:
- Update your CMS, all plugins, and all themes to the latest versions.
- Delete any plugins or themes you are not actively using, rather than just deactivating them.
- Change every password associated with the site: CMS admin accounts, hosting control panel, FTP/SFTP, database, and any connected email accounts.
- Enable two factor authentication wherever it is available.
- Review file permissions to make sure they are not overly permissive.
- If your hosting account itself may have been compromised, contact your host directly. They can check server logs for unauthorized access.
Step 5: Request a Review from Google
Once you are confident the malicious content is gone and the vulnerability is patched, you can ask Google to re-review the site.
- Log in to Google Search Console for the verified domain.
- Go to the Security Issues report.
- Read through the listed issues to confirm they match what you cleaned up.
- Click “Request a Review.” You will be asked to briefly describe what happened and what you fixed.
- Submit the request.
Reviews typically take anywhere from a few hours to a few days, though it can occasionally take longer. Do not submit multiple review requests in a short window if you do not hear back quickly. This does not speed up the process and can push your case to the back of the queue.
If you do not have Search Console access for the domain, you can still submit a request through Google’s public “Report incorrect phishing warning” or reconsideration form, though the Search Console path is faster and more thorough since Google can see your fix directly tied to a verified property.
Step 6: Verify the Warning Has Cleared Everywhere
Once Google confirms the review passed, the warning should clear from the Safe Browsing database, and browsers will stop showing it. Keep in mind:
- Different browsers and security products may cache blocklists for different amounts of time, so it can take a little while for the warning to disappear everywhere even after Google clears it.
- Check the transparency report URL again to confirm the current status.
- Some antivirus products and corporate firewalls maintain their own separate reputation lists. If the warning persists in a specific product after Google has cleared you, you may need to submit a separate reconsideration request directly to that vendor.
Step 7: Prevent This From Happening Again
A few ongoing habits significantly reduce the odds of a repeat incident:
- Keep your CMS, plugins, themes, and server software updated on a regular schedule rather than reactively.
- Use strong, unique passwords for every account tied to the site, stored in a password manager.
- Limit the number of admin-level accounts and remove access for anyone who no longer needs it.
- Set up automated backups on a schedule, stored somewhere separate from the live server, so you always have a clean restore point.
- Consider a web application firewall (WAF) service, which can block many common attack patterns before they ever reach your site.
- Periodically run an external malware scan even when nothing seems wrong, since some infections are designed to stay hidden from casual browsing.
- Monitor Search Console regularly, since it will often flag issues before they become widely visible.
Quick Summary Checklist
- Confirm the flag and read the specifics in Google Search Console or the Transparency Report.
- Restrict public access to the site while you investigate.
- Locate and remove the injected malicious content.
- Close the vulnerability that allowed the attack: update software, rotate passwords, remove unused plugins.
- Request a review through Search Console.
- Confirm the warning clears across browsers and security tools.
- Put ongoing security practices in place so it does not happen again.
How long can it take maximum, to resolve
There’s no official hard cap, but here’s a realistic range based on how the process actually plays out:
Typical timeline
- Most sites clear in anywhere from a few hours to 3 days once a review is requested, assuming the cleanup was thorough.
- Google states reviews “usually” complete within a few days, but doesn’t publish a strict SLA.
Where it can stretch longer
- Up to 1-2 weeks isn’t unusual if:
- The malicious content wasn’t fully removed and the review fails, forcing a resubmission (each failed attempt restarts the clock)
- The site is large or complex, making it harder for Google’s crawler to re-verify every flagged URL
- You don’t have Search Console verified, so you’re going through the slower public report form instead of the prioritized Search Console review queue
What actually causes indefinite delays
- Submitting multiple review requests back to back. This doesn’t speed anything up and can push you further back in the queue.
- Reinfection during the review window. If the attacker’s backdoor is still open, Google’s crawler may find bad content again mid-review, resetting things to square one.
- Third-party blocklists (some antivirus vendors, browser security add-ons) cache their own copies of the Safe Browsing list. Even after Google clears you, those can take extra days to refresh independently, and a few require a separate manual request to that vendor.
Bottom line
if the cleanup and vulnerability fix are done properly the first time, expect it resolved within about 3 days. The cases that drag on for weeks are almost always due to incomplete cleanup or reinfection, not Google being slow.
Getting flagged is stressful, especially since it directly scares away visitors and can hurt search rankings in the short term, but the process to resolve it is well defined and most sites are cleared within a few days of a proper cleanup and a review request.
More Information ℹ














Conversation
Login to comment.
Log In / Register