6 easy steps to add Hibernate to the Start Menu in Windows 11
This simple guide will educate you on how to add hibernate option in windows 10 since it was disabled by default.
Windows 11 includes Hibernate mode by default, a powerful power-saving feature that saves your entire work session to disk and completely shuts down your computer, unlike Sleep mode which continues drawing power. However, Windows doesn’t automatically show the Hibernate option in the Start Menu, leaving many users unaware it’s available.
Whether you’re a laptop user looking to extend battery life or anyone who wants to preserve their open applications without power consumption, enabling Hibernate in just a few steps can significantly improve your workflow.
Here are 6 easy steps to add Hibernate to your Windows 11 Start Menu.
Step 1: Open the Start Menu and Search for Control Panel
Click on the Start Menu icon (or press the Windows Key on your keyboard). Type Control Panel into the search bar and click on the app to open it.
Step 2: Navigate to Power Options
In the top-right corner of the Control Panel window, change the “View by:” setting to Large icons. From the list of tools, locate and click on Power Options.
Step 3: Click “Choose what the power buttons do”
Look at the left-hand sidebar of the Power Options window. Click on the link that says Choose what the power buttons do (or Choose what the power button does depending on your hardware).
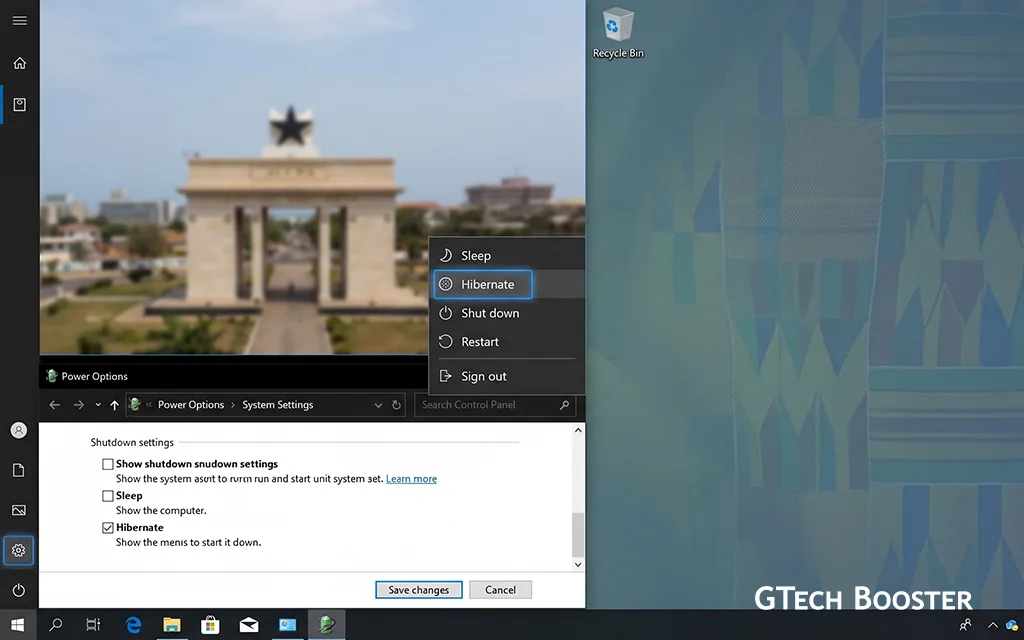
Step 4: Unlock the Hidden Shutdown Settings
You will see the Shutdown settings at the bottom of the page, but they will be greyed out and unclickable. To unlock them, look near the top of the window and click on the link with the blue and yellow administrator shield that says Change settings that are currently unavailable.
Step 5: Check the “Hibernate” Box
Scroll down to the now-unlocked Shutdown settings section at the bottom. Click the checkbox next to Hibernate to turn it on.
Step 6: Save Changes
Click the Save changes button at the very bottom of the window to apply your new settings.
You’re All Set!
Open your Start Menu, click the Power button, and you will now see Hibernate sitting right alongside Sleep, Shut Down, and Restart.
You’ve now successfully added Hibernate to your Windows 11 Start Menu! With just six simple steps through the Control Panel’s Power Options, you can now access Hibernate whenever you need to save your work session while achieving zero power consumption.
Hibernate is especially valuable for laptop users who want to resume exactly where they left off without draining battery, or for anyone who prefers shutting down completely without closing their applications. If Hibernate ever disappears or appears grayed out, remember you can re-enable it using the same Power Options path or via the Command Prompt with powercfg /hibernate on. Now you can enjoy the best balance between productivity and power efficiency on your Windows 11 device. Congrats you have now enabled the hibernation option .
More Information ℹ

Paul